Choosing the Right Cross-Stitch Pattern for Your Projects
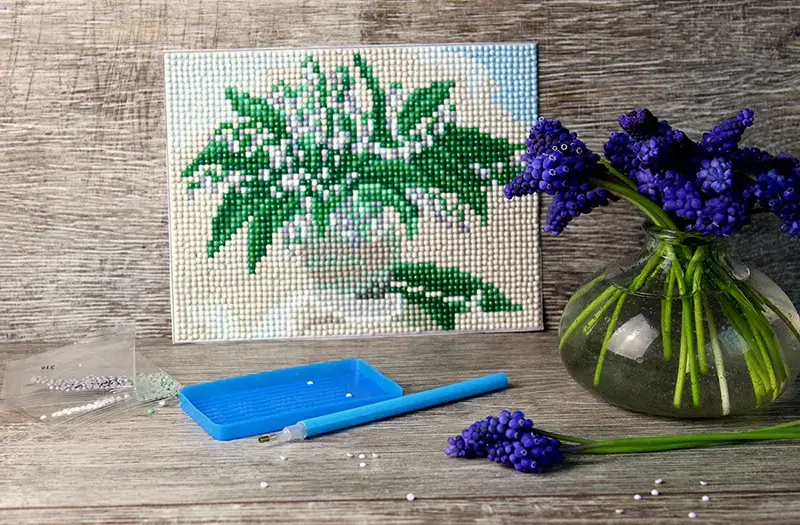
I love diamond painting because it is such a creative craft that allows me to produce stunning mosaic-style designs using small, sparkling “diamonds.” It’s a lot like paint-by-numbers but with gemstones, and the possibilities are endless. And that is why I love diamond painting on tiles. Not only can I pick my own patterns, but they are so easy to display, or use in my craft projects. Also, I always have extra drills, ad this gives me a chance to use them in a creative way.
Choosing a Cross-Stitch Pattern for a Diamond Painting Tile or Slate
If you’re thinking about transferring a cross-stitch pattern onto a tile or slate for diamond painting, you’re tapping into an exciting blend of two beloved crafts. But how do you choose the perfect cross-stitch pattern for this transformation? Here’s my step-by-step guide to help you get started.

1. Consider the Complexity of the Pattern
Cross-stitch patterns vary in complexity. Some are simple, with large areas of a single color, while others have intricate designs with numerous color changes. For a diamond painting on a tile or slate, a more simplified design often works best due to the space constraints and the size of the diamond drills.
- Best choice: Patterns with larger blocks of color or designs with less intricate detail.
- Avoid: Highly detailed patterns with subtle color changes that may lose clarity when transferred to the smaller scale of a diamond painting.
Pro Tip: Look for cross-stitch patterns labeled “beginner” or “intermediate” to ensure the design isn’t too busy or intricate.
2. Match Pattern Size with Tile/Slate Dimensions
Not all cross-stitch patterns will translate well onto smaller surfaces like tiles or slates. Before you settle on a pattern, measure the tile or slate you plan to use and compare it with the size of your cross-stitch design.
- Best choice: Choose a pattern that fits comfortably within your tile’s or slate’s dimensions without having to shrink it too much. Resizing a pattern can lead to a loss of detail.
- Avoid: Large patterns that require too much downsizing, as they can become indistinct when applied to smaller surfaces.
Pro Tip: Use a simple square or rectangular design for easier alignment on your tile.
3. Pick a Design with Bold, Clear Shapes
Certain designs naturally lend themselves to diamond painting. Bold and clear shapes are easy to work with and will create a striking visual effect when complete. Themes such as geometric patterns, flowers, animals, or even simple text can stand out beautifully on tile or slate.
- Best choice: Choose patterns with clear outlines, distinct color separations, and minimal shading.
- Avoid: Designs with lots of tiny details that could blend together, making the final result look messy.
Pro Tip: Abstract and geometric patterns often look fantastic because of their clear lines and solid color blocks.
4. Choose the Right Colors
The color palette of your cross-stitch pattern is crucial for a beautiful diamond painting. Make sure the colors contrast enough to give a striking final product. With a tile or slate, the color of the surface will also affect the appearance of your design.
- Best choice: Patterns with contrasting, vibrant colors that will pop against the tile or slate.
- Avoid: Very pale or similar colors next to each other, which may blur when transferred to the smaller diamond canvas.
Pro Tip: Consider the background color of your tile or slate. If it’s dark, avoid dark-colored patterns that might blend into the surface.
5. Test the Pattern with a Mockup
Before diving into the full diamond painting, consider making small mockups of your diamond painting patterns. You can do this on paper or even with digital tools to get a sense of how the final piece will look. This step can prevent wasted time and materials if the pattern doesn’t work out as expected on the tile or slate.
- Best choice: Test the pattern in sections or at full size on paper.
- Avoid: Skipping this step if you’re not sure how well the cross-stitch pattern will translate to diamond painting.
Pro Tip: If your mockup shows that the design is too busy, simplify it by reducing color shades or eliminating unnecessary details.
6. Ensure Cross-Stitch Pattern Compatibility with Diamond Painting
Not every cross-stitch pattern will be compatible with diamond painting. Cross-stitch patterns use X-shaped stitches to form images, while diamond painting patterns use square or round drills to cover areas. Patterns with lots of open spaces may not work as well for diamond painting.
- Best choice: Choose patterns that have solid coverage or can be adapted for diamond painting without leaving too much empty space.
- Avoid: Patterns with lots of intricate backstitching or open areas, as these may not translate well to a diamond painting format.
Pro Tip: You can modify a cross-stitch pattern by filling in gaps with complementary diamonds to ensure the design translates better.
Conclusion
When choosing a cross-stitch pattern to use for a diamond painting tile or slate, balance is key. You want a design that’s detailed enough to be interesting but not so complex that it loses clarity in the diamond painting medium. Opt for patterns with bold shapes, vibrant colors, and a size that fits your tile or slate perfectly. With a little planning and creativity, you can turn a simple cross-stitch design into a stunning piece of diamond art.
Happy crafting! Would you like more tips on how to transfer cross-stitch patterns to other mediums, or are you curious about which diamond painting kits work best with certain designs? Let me know in the comments!

